

How To Import To Computer From Canon Camera
You tin can connect the camera to a computer via a USB cable, and save images to a computer running Windows OS without installing any additional software applications. The procedures for connecting the camera to the computer running Windows Os with a USB cable (camera end: Mini-B), and saving images to the estimator are explained below.
IMPORTANT
- Depending on the camera model, a USB cable may not exist included with the camera.
- If y'all do non own a USB cable, please purchase one separately.
REFERENCE
The following ii types of USB cables are bachelor for meaty digital cameras:
*For more than information about the type of USB cablevision that can be used with your camera, please refer to the camera’s instruction manual.
- Camera cease: Mini-B (IFC-400PCU)
- Camera stop: Micro-B (IFC-600PCU)
Connect the Photographic camera to the Figurer
ane. Connect the <DIGITAL> terminal of the camera to the figurer's USB port using a USB cable (camera finish: Mini-B).
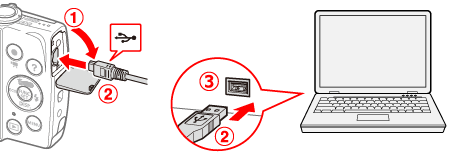
 <DIGITAL> concluding (Camera)
 USB cable
 USB port (Computer)
Important
Example procedures are shown on the PowerShot A2600/PowerShot A2500. The position and shape of the operation buttons, screens displayed, and setting items may differ co-ordinate to the model you utilise.
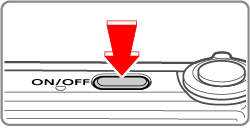
2. Press the power button to turn the photographic camera on.
Note
- If an awarding for saving images, such as CameraWindow, starts, please close it.
- Depending on the camera model, once the connection between camera and computer is fix, the camera will plow on automatically.
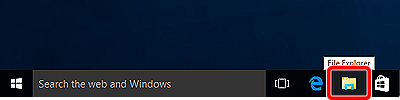
3. Click [File Explorer] on the taskbar appearing on the bottom of the screen.
iv. When the following screen appears, select [This PC] from the card items on the left side.
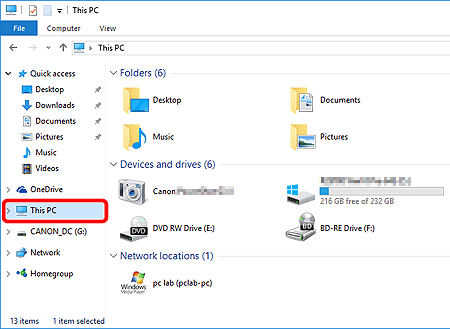
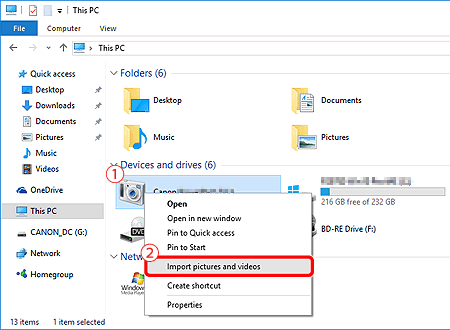
5. Select the camera connected to the PC (), and then correct-click on the icon. Next, select [Import pictures and videos] () from the screen displayed.
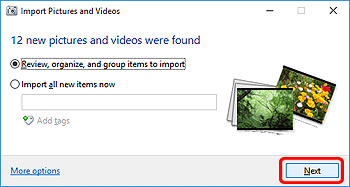
half-dozen. Click [Adjacent] when the [Import Pictures and Videos] screen is displayed.
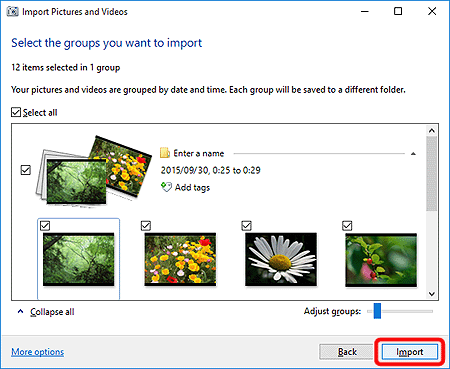
7. Click [Import] to brainstorm epitome transfer.
Annotation
- [Select All] is set by default.
- To select images to import individually, remove the cheque from [Select All], and suspend desired images with a [
].
8. Prototype import (transfer) begins.
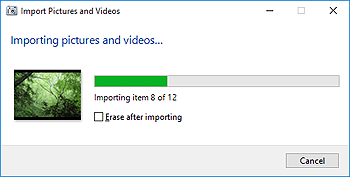
nine. When image transfer is complete, a screen like to the following one appears.
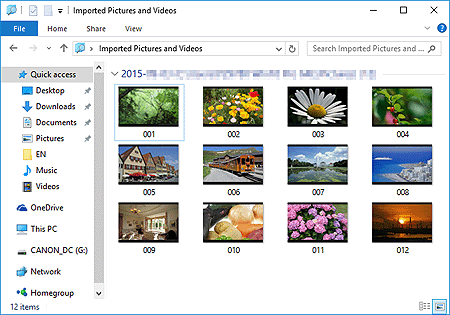
This completes the procedures for importing images.
Changing the Automated Outset-up Settings for Software Applications.
To prevent software applications from starting automatically, follow the procedures below to alter the [AutoPlay] settings.
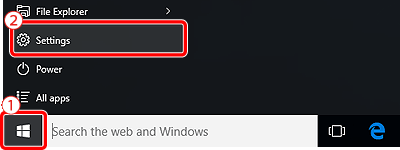
one. Click the [Start] push button actualization at the bottom left of the screen (), and so choose [Settings] ().
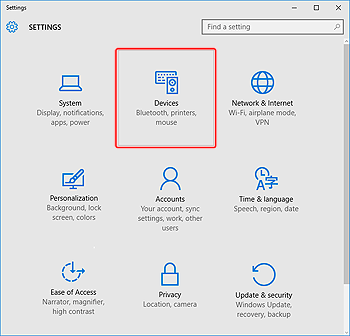
two. Choose [Devices] from the screen displayed.
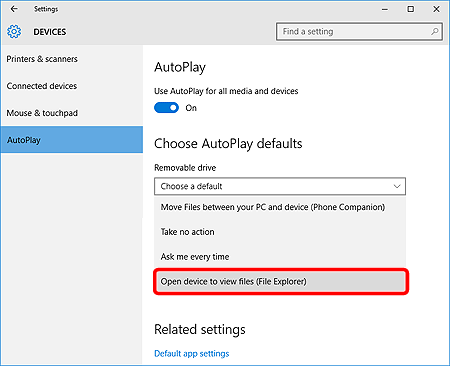
3. Select [AutoPlay] () from the options actualization on the left of the screen to display the AutoPlay setting screen, select the camera () continued to the computer and right-click the icon.
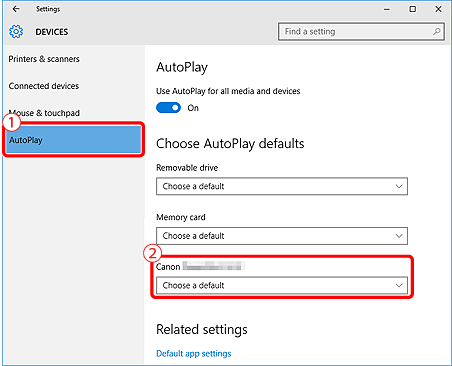
4. Make the settings.
- Choose [Open device to view files (File Explorer)].
This completes the procedure for irresolute the AutoPlay settings.
Source: https://support.usa.canon.com/kb/index?page=content&id=ART164553
Posted by: biondohuriturnar.blogspot.com
0 Response to "How To Import To Computer From Canon Camera"
Post a Comment